Introduction
This section describes how to take digital images of excellent quality with cheap equipment. Most of these techniques were shared by other Arachnologists and few developed here. If you find improvements please share them.
The 10X and 20X PLAN-APO objectives of a regular optical microscope that uses glass slides produce images considerably sharper than a dissecting microscope at the same magnification, but with a very narrow focal length and no working distance to manipulate the specimen. Dissecting microscopes resolve these issues by stacking many lenses of different shapes to increase working distance, focal length and correct light refraction aberrations. However, light traveling through so much glass will always lose resolution because its electromagnetic interactions with this material. The perfect lens could be compared as a "glass sandwich" that optimizes these variables and usually are very expensive.
The narrow focal length problem of optical microscopes that uses glass slides is resolved by combining several images at different focal lengths. We have used Helicon Focus for several years to combine stacks of images and highly recommend it. Most combined images did not require any editing, and the cases that it did was either moderate to very little. This is important when thousands or images are required for diversity inventory websites. We take on average 35 images to produce one combined picture. The stack of images is taken manually keeping track of how the focal length overlaps from top to bottom. Automatic equipment have similar or better results in less time.
Preparations setup
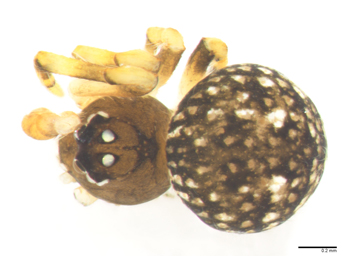
The Petri dish with sand. This has been known for many generations of Arachnologists and its practical value is appreciated when hundreds of specimens need to be sorted and photographed. Cover the specimen partially in the sand until the desired position is maintained and remove alcohol until the surface is close to the specimen. Alcohol base gels are not recommended because they are impossible to thoroughly remove from the specimen, they produce many bubbles and create more optical distortions than liquids.
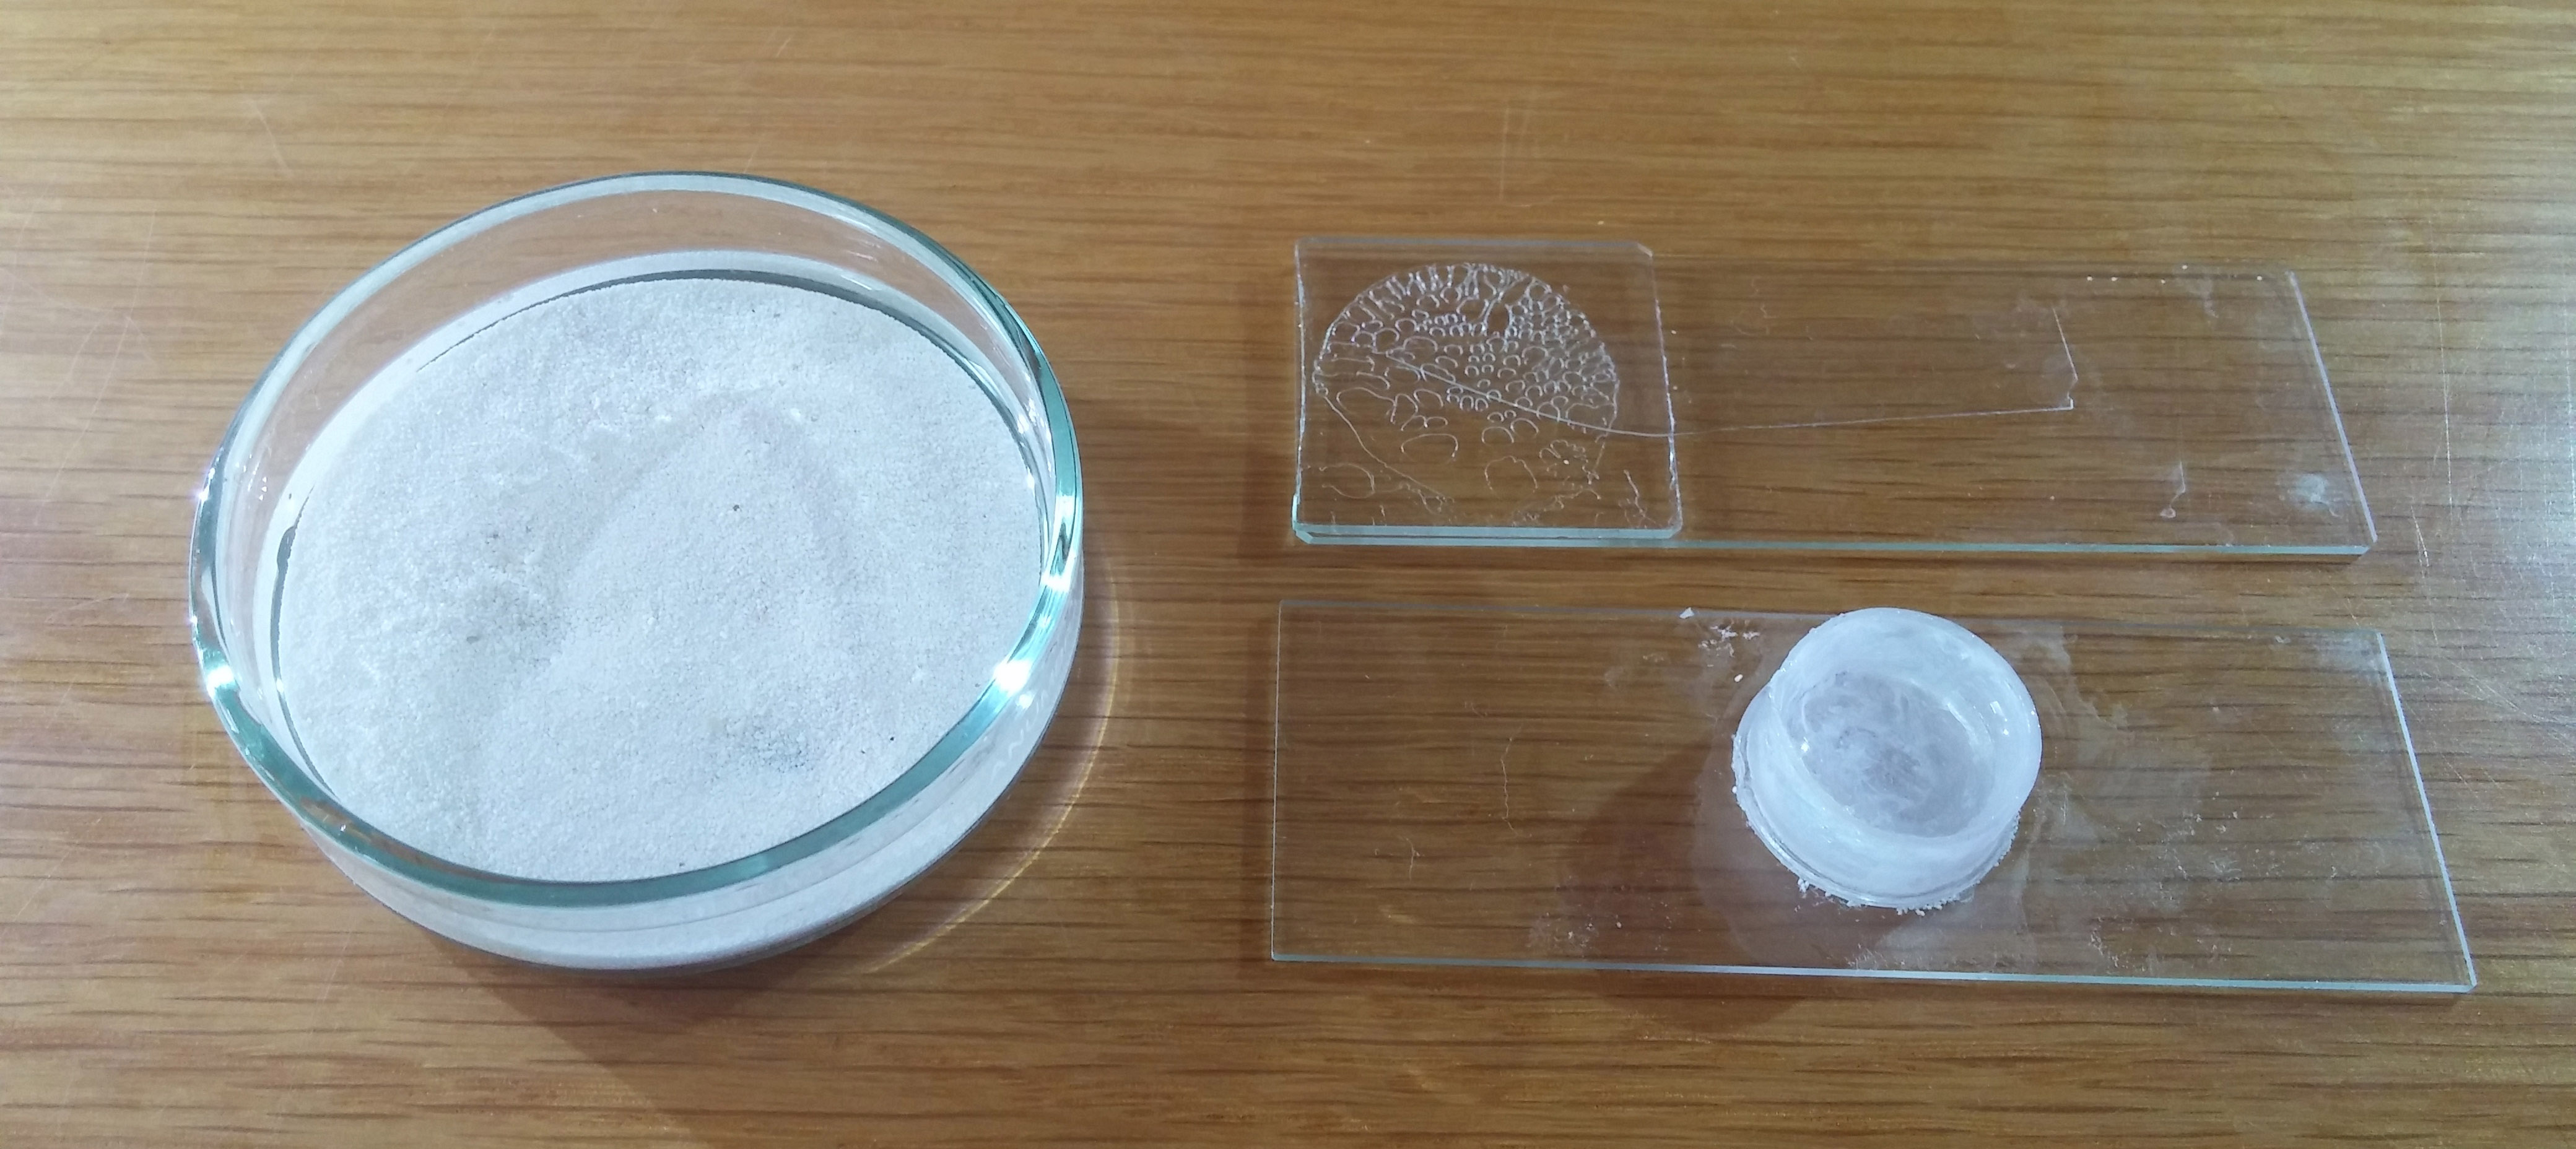
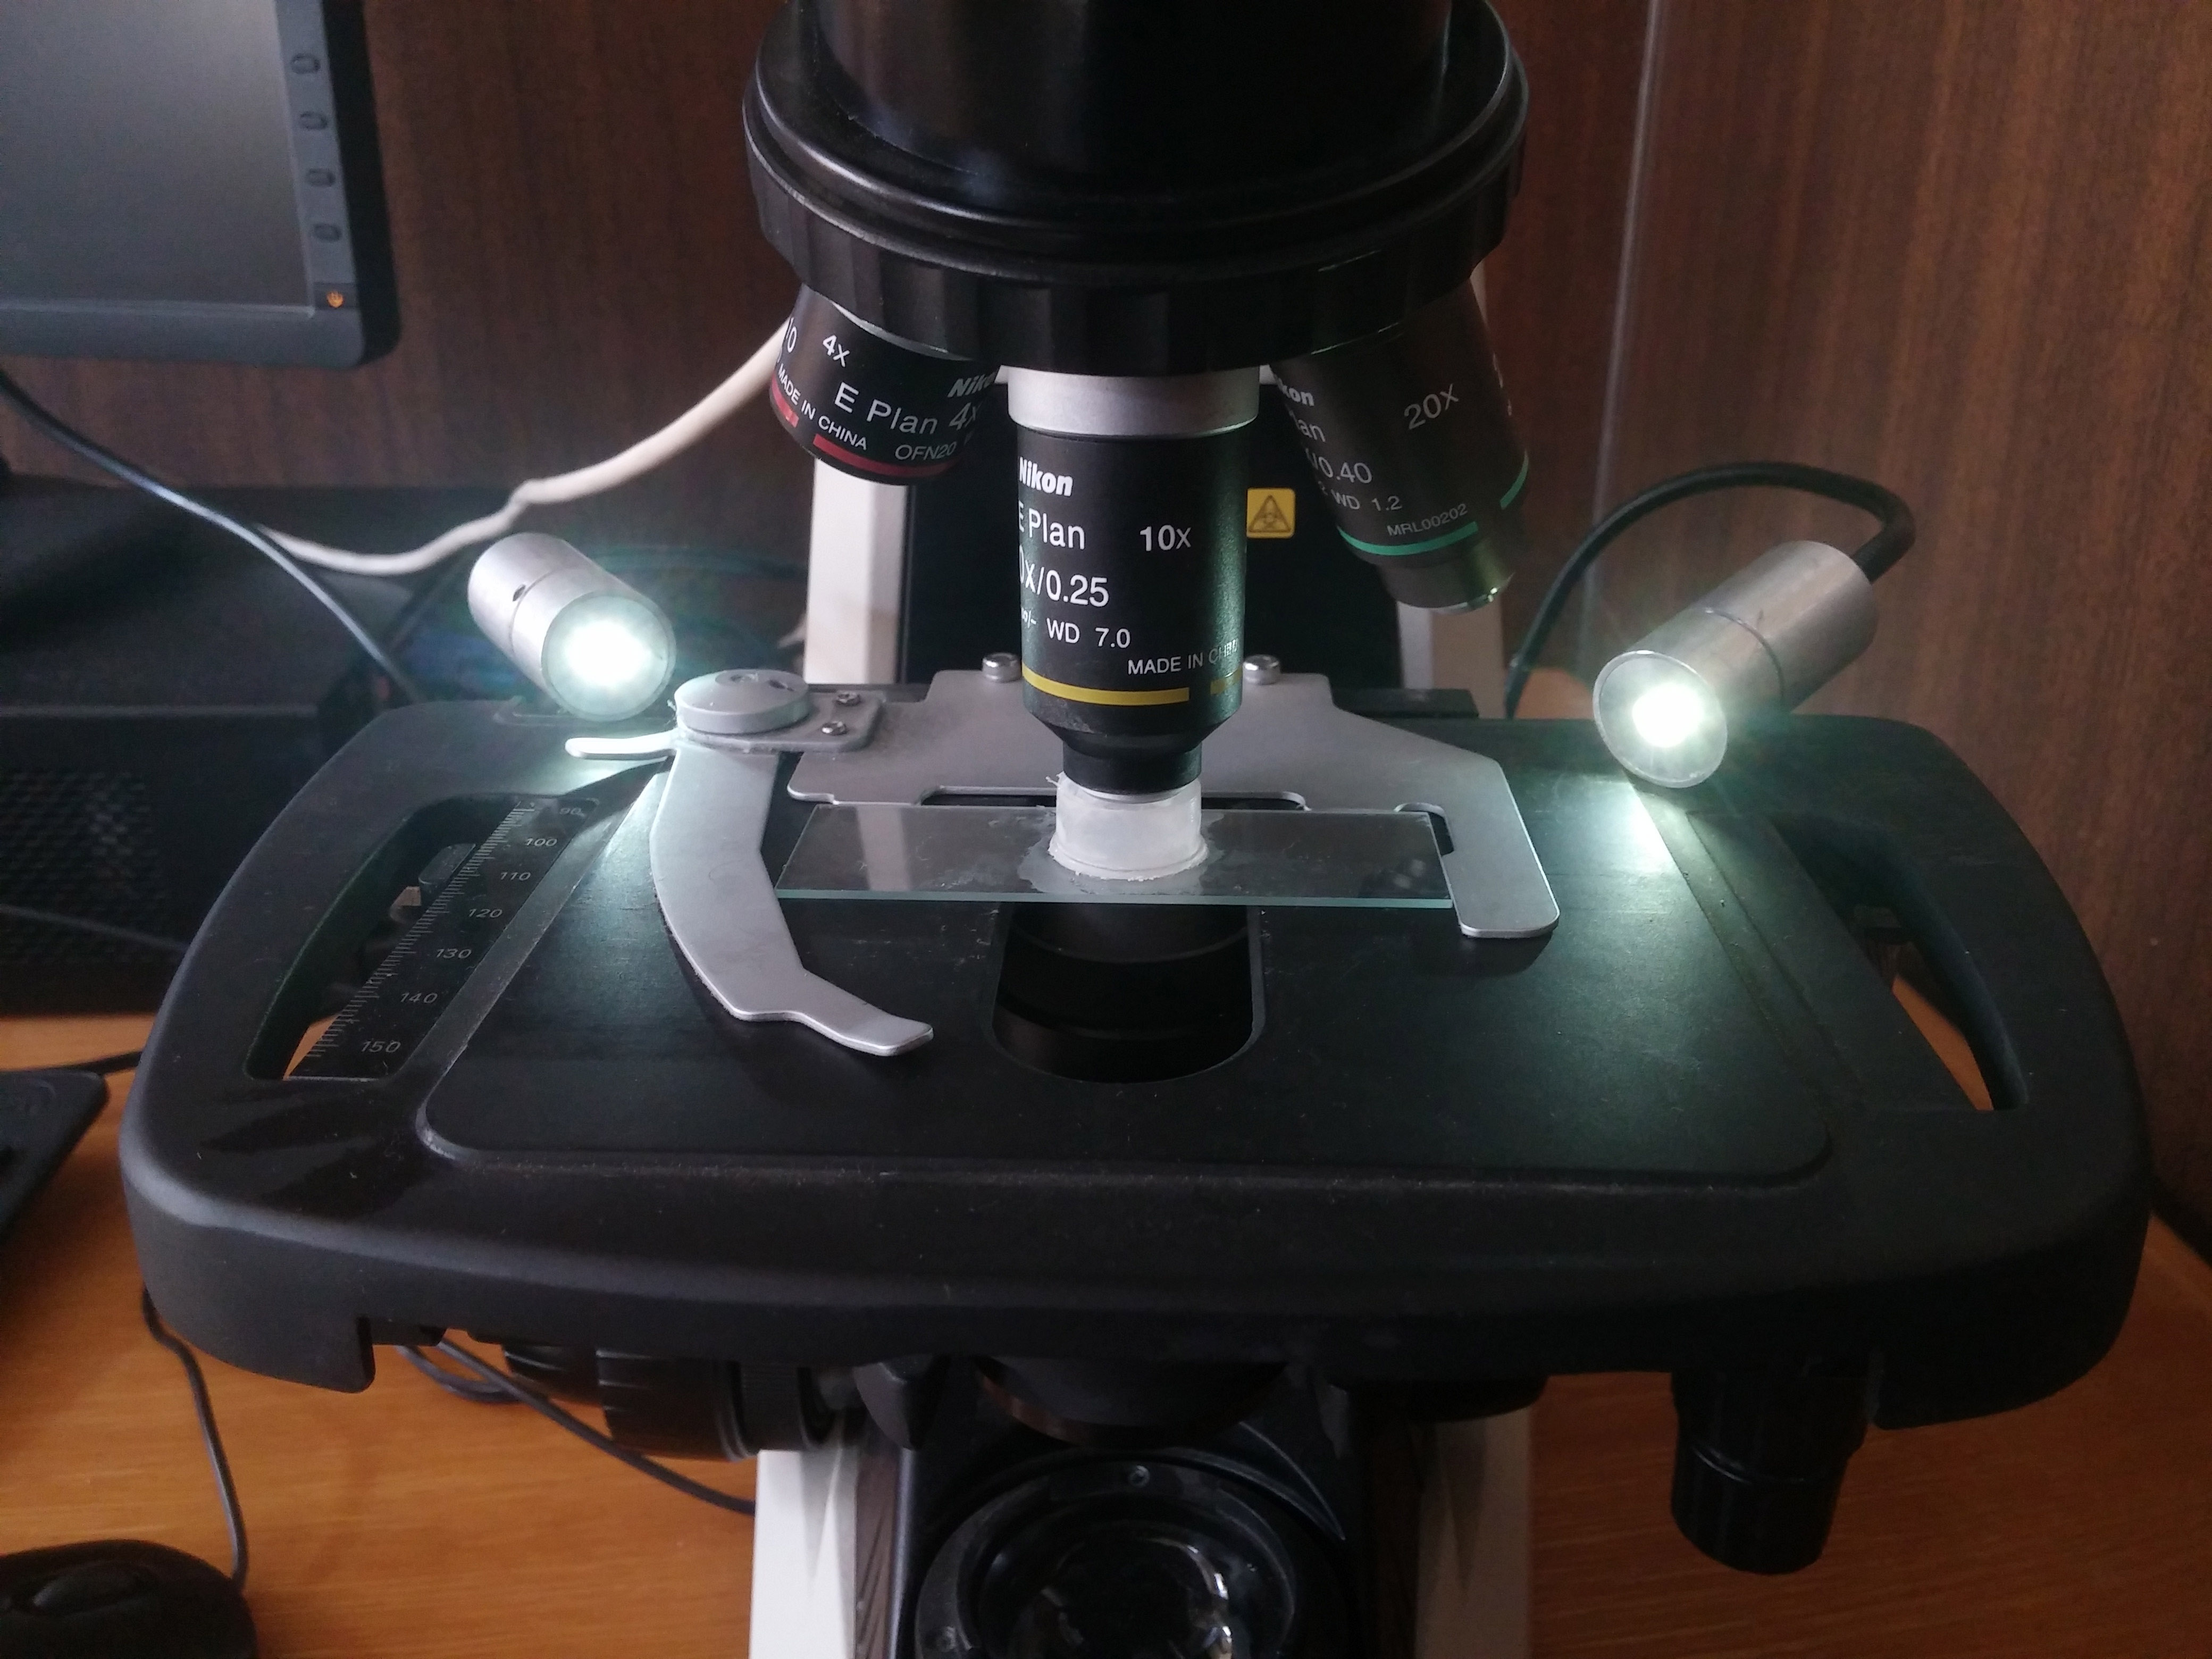
Technique for 100X This preparation setup uses the tiny dish on the bottom right of the image glued over a glass slide. It is used for non-cleared structures or specimens less than 1 mm. A plastic lid or a small well will also work fine. The plastic lid (or well) diameter has to be wide enough to allow the objective lens to enter and tall enough to contain enough alcohol to cover the specimen. Our plastic lid has a internal diameter of 1.53 cm external of 1.66 cm and a height of 0.9 cm. Illumination is provided with a led lamp.
Mounting the specimen. Looking through a dissecting microscope paste a drop of petroleum jelly in the bottom of the plastic lid. The surface must be dry otherwise the jelly will never stick. Fill the dish with alcohol, remove jelly to get the required shape to receive the specimen and paste it. Transfer the preparation to a microscope for slides to take the images. The petroleum jelly is completely removed from the specimen by shaking it for 15 seconds in a vial with chloroform or xylol.
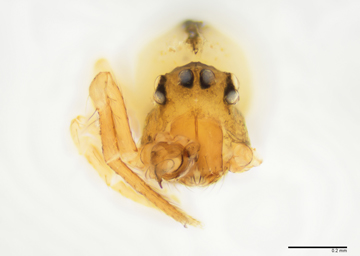
Technique for 200X Repeat the steps for the 100X technique but is an excavated glass slide (1 or 2 mm depth). Fill the well with alcohol and seal it with a glass slide cover letting all bubbles scape. It can hold enough alcohol for several minutes before introducing bubbles. Illumination is provided with a led lamp from the top. For background place a white or black sheet of paper under the glass slide preparation.
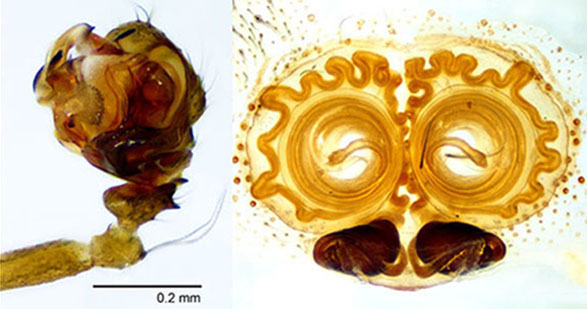
Technique for cleared structures. It uses the temporary slide (top right) with either clove oil or methyl salicylate. Jonathan Coddington thoroughly described this glass slide preparation in a book chapter difficult to find; therefore, a brief description is provided here. Paste several glass slide covers on one glass side for microscopes, the height of this covers stack must be slightly taller than the structure to be observed. Cut a narrow glass stripe, from a long slide cover, and paste it with petroleum jelly to the top of the stack of slide covers. Add a drop of clove oil or methyl salicylate to unite both pieces of glass and cover the specimen.
Important. The cleared specimen must be submerged in alcohol or clove oil at all times to avoid bubbles. Under a dissecting microscope transfer the specimen with a pipette and place it under the tallest part of the narrow glass stripe. Manipulate the structure until the desired view is maintained; only then transfer it to the microscope for slides. Tiny adjustments can de made by gently taping the long slide cover, but major changes must be done in the dissecting microscope. Check that the width of the glass stripe protects the objective form the clove oil.
Images Composition Rules
This list will provide the rules to make the image composition constant among or within inventories.
- Remove all legs and pedipalp from the left side of the specimen. Dissect the cephalothorax appendices in the membrane between the coxa and trochanter and check for cuticle or muscle fragments that may spoil the image. Composition of the specimen orientation is free but seek to be constant.
- Maximize information content with few high resolution images, instead of several small images of the same structure.
- Do not crop images and keep the original width and height given by the camera. If the structure looks too small, then an instrument with more magnification is required.
- Sixteen standard views (combined stack of images) are enough to document the anatomy of a species with both sexes and provide data for reliable identifications. Eight images document the overall anatomy (habitus and prosoma). Four images for epigyna (two with the epigynum attached and two dissected and cleared) and four images for the male left pedipalp. We recommend an upper bound of 20 images per species.
Workstations
All images were taken with the following Nikon equipment. The first workstation has two digital cameras a DS-Fi1 connected to the dissecting microscope SMZ1270 and a DS-Fi2 connected to the glass slides microscope E200, both cameras are controlled with a desktop Dell Inspiron 660s. The second work station has a SMZ1000 and E200 microscopes both sharing a DS-Fi3 connected to a HP Slimline 270-a0xx. Illumination is provided with custom made lamps made of two 1.5 watts LEDs of 2 cm in diameter. The LEDs are mounted at the end of flexible tubes on aluminum heads to diffuse heat.